Two kinds of jobs
Pool Founder has two kinds of jobs. A maintenance job is recurring service — weekly pool cleaning, chemical balancing — that runs on a route week after week. A work order is a one-time service call — a pump repair, an equipment install, a green-to-clean. Both are created from the same Create Job screen, and both live on the Jobs page, where you can create, edit, suspend, and archive them.
Work done during the regular visit, like a filter clean, is usually a task on the maintenance job, not a work order. Work that needs its own visit, like a pool opening, a closing, or a DE filter teardown, is a work order. To create those for all your pools months ahead and book them later, see Work orders to schedule.
Setting up service for a whole imported customer book? Don't create jobs one at a time — use Add Service in Bulk to apply one job template to many pools at once. The Jobs page shows a banner counting pools with no service scheduled that links straight to it.
Create a job
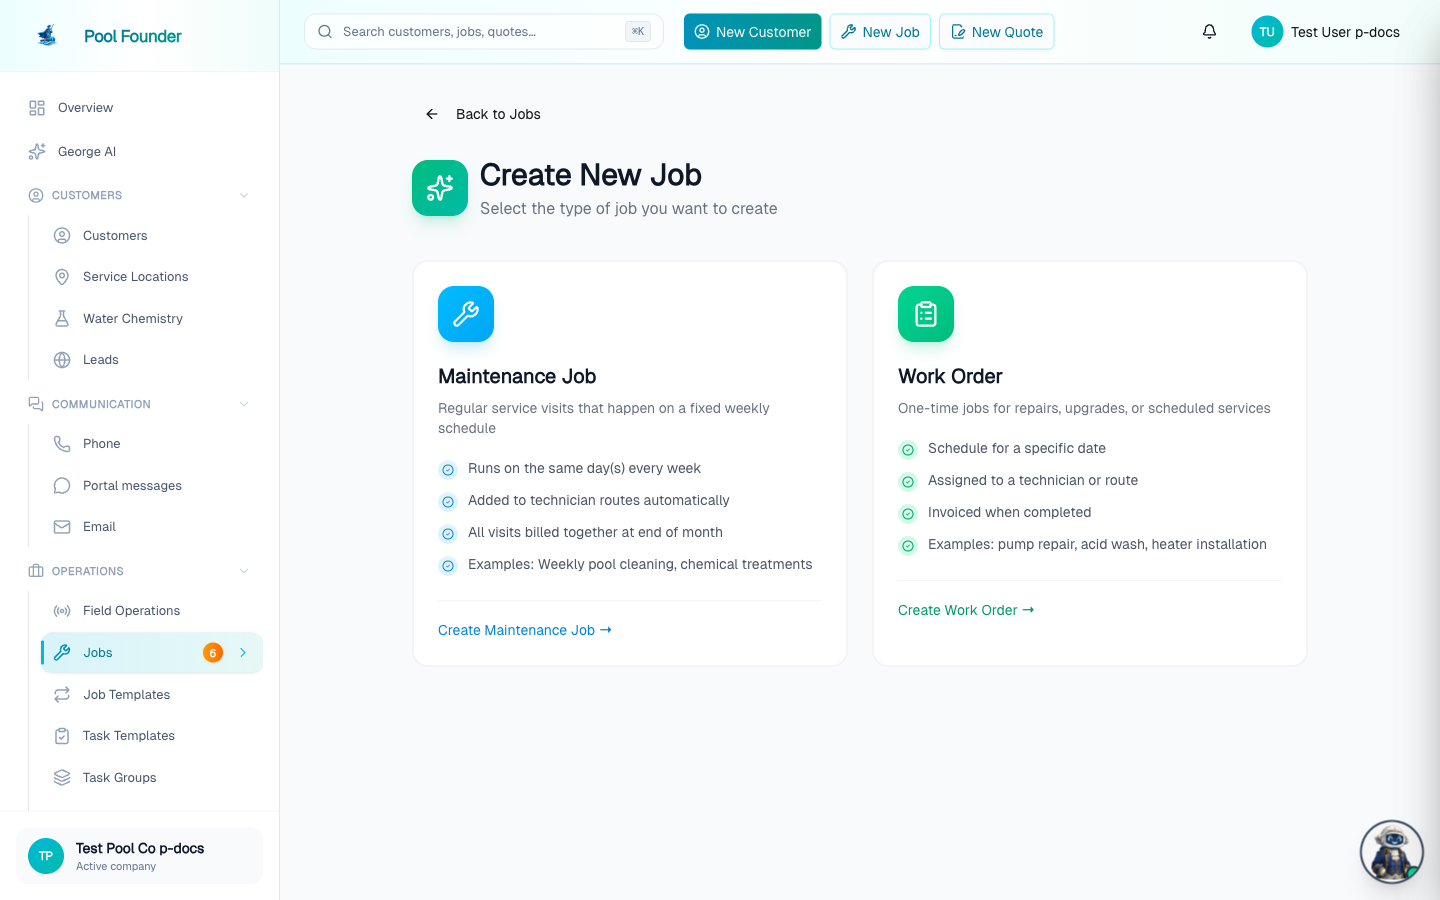
- 1Open Create Job and choose Maintenance Job (recurring visits) or Work Order (one-time).
- 2Both are single scrolling forms. Use Load template at the top to start from a job template if you have one.
- 3Pick the customer, service location, rate, billing mode, and the task templates that make up the technician's checklist.
- 4Submit with Create Job (maintenance) or Create Work Order / Create & Schedule (work order).
- You never have to invent a job name — names are auto-filled from the customer and can be edited later.
- $0-rate jobs are allowed — for example, chemicals-only billing where only chemical charges are billed.
- For maintenance billing options (per-visit, monthly or weekly flat rate, external), see maintenance billing modes.
Work order line items: parts, quantities, and sales tax
A work order's Line Items are the charges that go on the customer's invoice. Next to the heading are Copy from Job, Add from catalog, and Add (a plain line with a title and one price).
- Add from catalog searches your parts and chemicals ("Search parts and chemicals"), showing each item's price, stock, and tax rate. Click or press Enter to add; the list stays open for more. Catalog lines show a Part or Chemical badge and price as Qty × Unit price = Amount.
- Every line has a Taxable switch. Turning it on fills in your Default tax rate from Invoice Settings; catalog lines start at the item's own rate. With no default set, a Set a default rate in Invoice settings link appears.
- The optional description sits behind Add details.
- A catalog line needs both a quantity and a unit price. If either is blank the row says "Enter a quantity and unit price" and the work order won't save until you fill it in or remove the line.
- The totals show Subtotal, Discounts, your tax row, and Total. With Require Deposit checked, "Deposit is calculated on the subtotal before discounts and tax," and a taxed total notes "Tax is charged on the final invoice."
- After creating, the work order's Pricing card shows each line's quantity and "Taxable 6%" plus the tax row, and the total at the top of the job page reads "Includes $X Sales tax". Its pencil opens Edit Pricing, with the same Add from catalog and Taxable controls.
- Adding parts as line items never changes stock. Invoicing the work order charges each line's tax automatically.
Work order templates, Copy from Job, and quotes converted with Create Work Order keep every line field (quantity, unit price, catalog link, and tax rate). Details: catalog parts and taxable line items.
Start from a template
The Load template button at the top of the form pre-fills the job from a job template, and maintenance jobs have a Save as template option so a job you just configured can become the starting point for the next one. Job templates live on the Job Templates page — each carries a rate, billing mode, and task checklist — and template edits can propagate to the jobs using them. With QuickBooks connected, a job template can also carry a QuickBooks item that the service charge of every job on it posts to; see QuickBooks sync.
Work orders for people who aren't customers yet
A work order doesn't require an existing customer. Use Quick add contact to create one on the spot:
- 1In the work order form, open the Service Location dropdown and choose Quick add contact at the bottom of the list.
- 2Enter an email or phone number plus the service address (name is optional), then click Create Contact.
- 3A minimal customer and service location are created automatically and selected — so invoicing, emails, and routes all work normally. If the email or phone already matches a customer, that customer is reused instead of duplicated.
The customer's details can be filled in later on their customer page. The same quick-add option exists in the technician mobile app's work order form — see work orders in the field.
Task checklists
The task templates you pick on the create form become the checklist the technician works through on each visit — checkoff items, text entries, multiple choice, and water chemistry readings. To build reusable checklists and apply the same one to many jobs by job type, see task templates and groups. On a maintenance job, the $ box beside a task sets a price that is charged on the next maintenance invoice only on visits where the task is checked off; see priced tasks. Load template also fills in the task prices set on the job template, and applying a task group adds its tasks with the prices set on the group.
Per-stop task overrides: "Just today" tasks
A job's checklist doesn't have to be the same every visit. On a route page's day view, each stop has an edit-tasks button that opens the Tasks for this stop dialog, which splits the checklist into two lists:
- Every visit — the job's permanent tasks. Changes here (adding, removing, or toggling required) update the job itself.
- Just today — one-off tasks for this stop on this date only. They vanish from the checklist after the visit.
The Add task picker searches your task templates and asks which scope to add to — Just today or Every visit. Each task row also has a required/optional toggle ("Required — click to make optional"), so a normally-required task can be relaxed for one visit, or a one-off task made required. Technicians can add "just today" tasks from the mobile app too.
Reviewing field-created work orders
When a work order is created from an unplanned stop in the field, it can land in an office review queue instead of billing immediately. (Creating one takes the "Create jobs" permission, which the built-in Technician role doesn't have; see roles and permissions.) The Field Work Orders Review page (its sidebar entry shows a count badge when work orders are waiting) lists each pending work order with a Created in Field badge, who created it, the route date, customer, service location, notes, and line items with a total. Three ways to resolve each one:
- Approve & Create Invoice — approves the work order as-is so it can be invoiced.
- Edit & Approve — opens the line items for editing (change descriptions and amounts, add or remove lines, Add from catalog, turn Taxable on or off, watch the total update) before approving with Save & Approve.
- Reject — archives the work order; it will not be invoiced.
Every review dialog has an optional Admin Notes field for recording why you approved, changed, or rejected the work order, and a View Details button opens the full job page. For how technicians create these on their phones, see field work orders and stops; for invoicing approved ones, see work order billing.
Frequently asked questions
Do I have to come up with a name for each job?
No. Job names are auto-filled from the customer, and you can edit them later if you want something different.
Can a job have a $0 rate?
Yes. $0-rate jobs are allowed — commonly used for chemicals-only billing, where the base rate is nothing and only chemical charges are billed.
Can I create a work order for someone who isn't a customer?
Yes. Open the Service Location dropdown in the work order form and choose Quick add contact — an email or phone number plus the service address is enough (name optional). A minimal customer record is created automatically, or an existing one is reused if the email or phone matches.
What's the difference between a maintenance job and a work order?
A maintenance job is recurring service that repeats on a route (weekly cleaning, chemical balancing). A work order is a one-time service call that needs its own visit (a pump repair, an equipment install, a green-to-clean, a pool opening). Work done during the regular visit, like a filter clean, is usually a task on the maintenance job instead.
Can I add a task to just one visit?
Yes. On the route page's day view, open the stop's Tasks for this stop dialog and add the task under "Just today" — it applies to that date only. The same dialog toggles any task between required and optional for the job or for the day.
Can I add a part from inventory to a work order and charge tax on it?
Yes. In the work order's Line Items, click Add from catalog and pick the part. It is added at quantity 1 and its Customer Price with the part's own tax rate. Any line, including labor, can be taxed with its Taxable switch. Adding the part does not take it out of stock.
What happens when I reject a field-created work order?
It's archived and will not be invoiced. Use the optional Admin Notes field to record why. Approving (with or without edits) makes the work order invoiceable.